Tags
crafts, Decorating, DIY, household, leaf stamps, painting, stamps
So my hubby and I were getting ready for a new joy in our life to arrive and decided to paint the nursery other than the usual solid color we painted every other room in the house. Believe me, this was a HUGE deal. First we were going to do stripes, then we couldn’t agree on what kind of stripes, how thick the stripes should be, etc. Finally, we chose to add a wall mural instead of the stripes and everyone (including baby) have enjoyed the tree ever since.
I am very thrifty and a little creative, so I decided to try the mural myself. It seemed like a big undertaking because I am not skilled in the area of drawing or painting, but it was not as difficult as I thought.
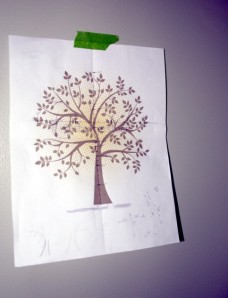
I found a graphic online that I liked and drew a grid on the page to help set it up.

For the tree, I chose to paint the branches first.
I decided to make a WALL STAMP for the leaves rather than paint them by hand.

You could use a potato or apple stamp if you don’t have other materials, but I found some scrap wood in the garage and some craft foam that made a perfect stamp. I cut 2 large leaf shapes and 2 smaller leaf shapes to glue together so they would be double thickness. Then I used extra strength glue to attach them to the wood blocks. Note that only the top pieces of craft foam have the vein cutouts in the leaf, and the piece of foam closest to the blocks are a solid leaf. You could do the veins in both, but your paint will get lost inside.
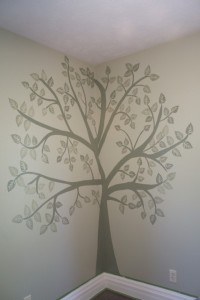
I started putting leaves on the left side, then did the right side another day and just added large or small to even it out. My tree was not exactly like the picture, but it was close and we loved it!
The finished nursery:
- Use supplies and paint you already have.
- Try something new.
- Stamps can really make a painting project fun and beautiful!


this is really pretty, love the idea.x
Thanks! It wasn’t that hard to paint, either. Just went off a drawing I got online.
I have seen this up close and personal and it is beautiful!
Thanks 🙂
That is beautiful! What a great idea. I love your blog by the way. You have so many great ideas.
Thanks! Jodi